Change Background Color of Photo to White Mac
It would be wonderful if we could all be good at photo editing. But because we're not, the experts give us tools to use that make editing images a little bit easier.
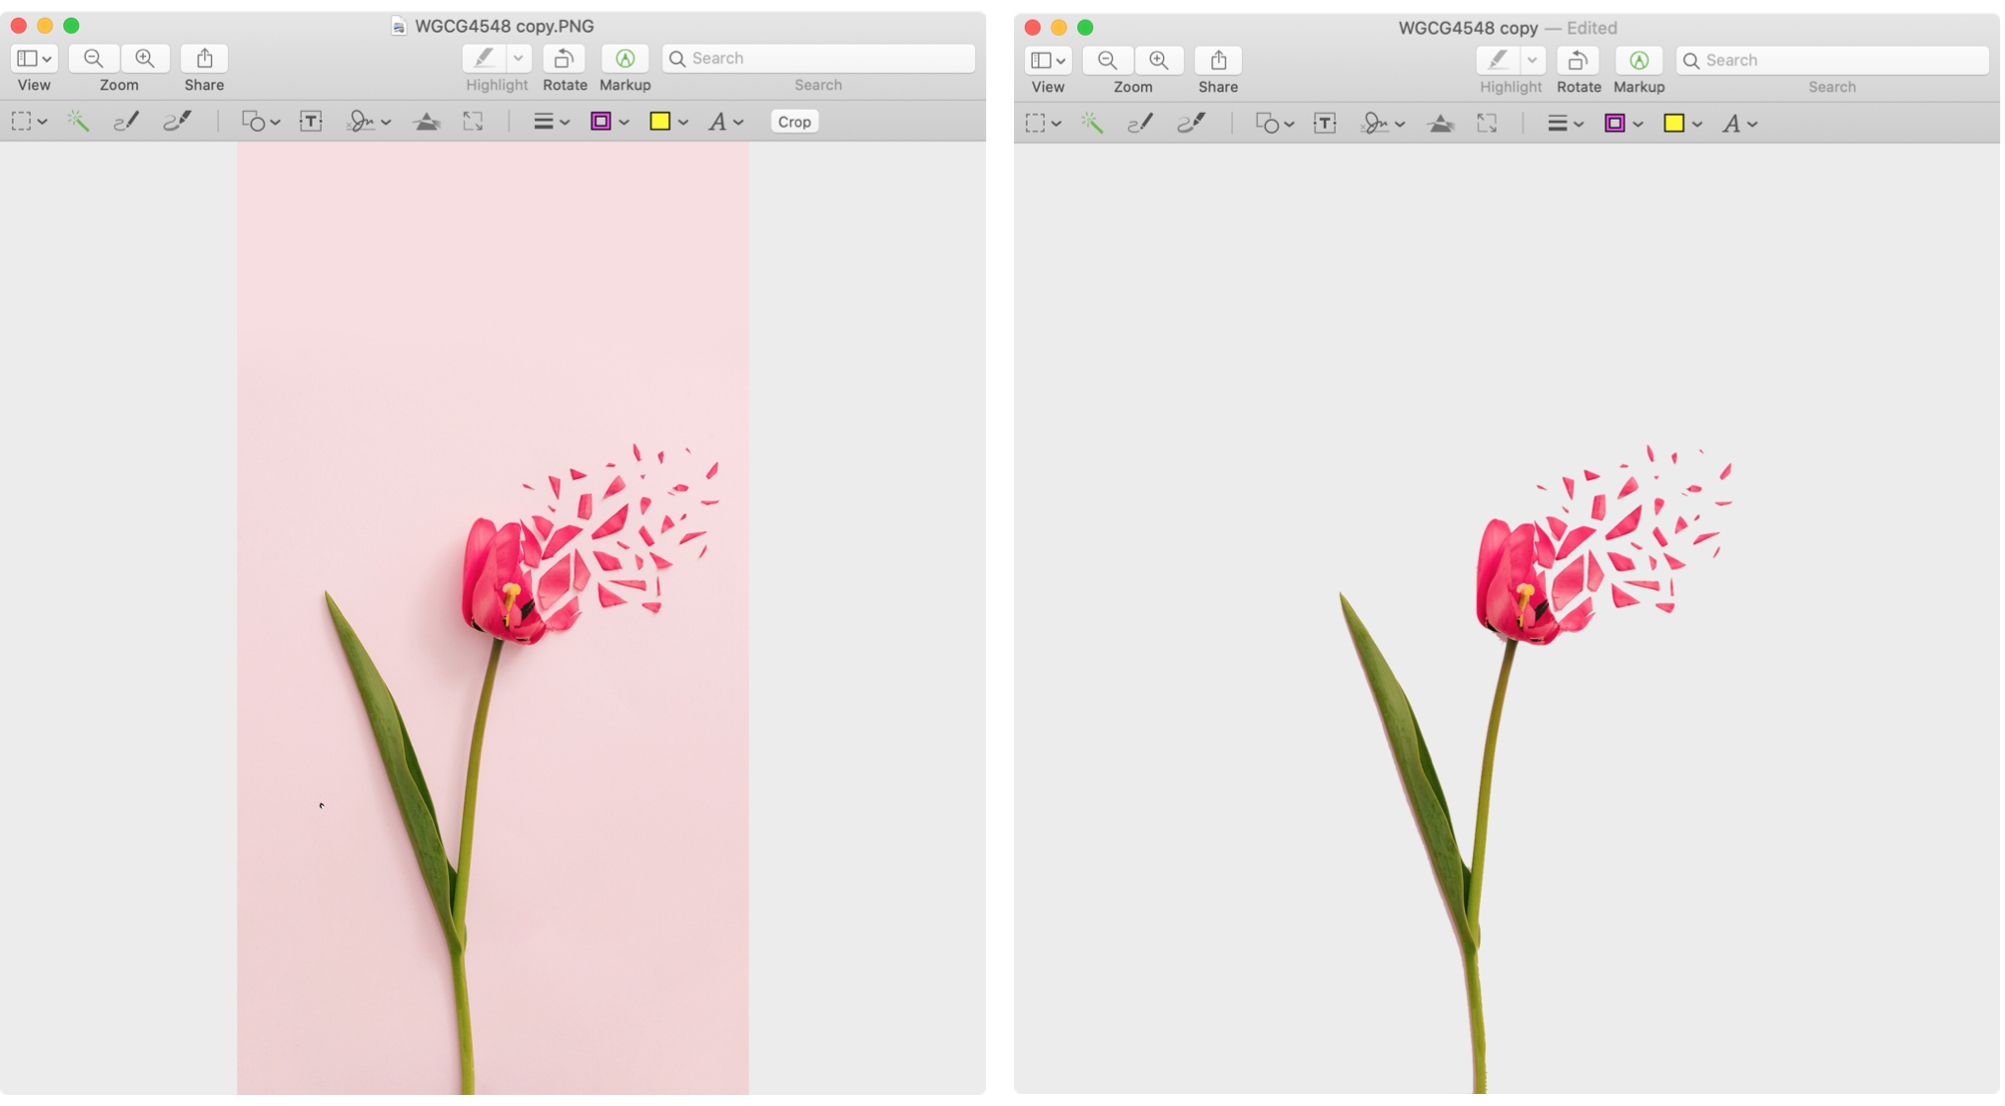
The Preview app on Mac isn't the best option for editing photos, but for simple things it works. If you'd like to remove the background from an image using Preview on your Mac, this tutorial shows you two ways to do it.
Remove the background in Preview
This first method works best if the background in your photo doesn't blend in with or has different colors than the part of the photo you want to keep. Open your image in Preview and then follow these steps to remove the background.
1) Click the Markup button in the Preview toolbar.
2) Toward the left side, click the Instant Alpha tool which looks like a wand.
3) Begin dragging through the background of your image. The tool will automatically select pixels of adjacent matching colors as you drag. This is why using this method works better if your background is colored differently than the section you want to keep.
4) You may be able to select the entire background in one fell swoop. But since this is unlikely, you can simply select it in sections. Stop dragging when you capture a section you'd like to remove and click your Delete key.
5) Follow the same steps 3 and 4 above to select additional sections of the background and delete them. You can continue doing this until the entire background is removed.
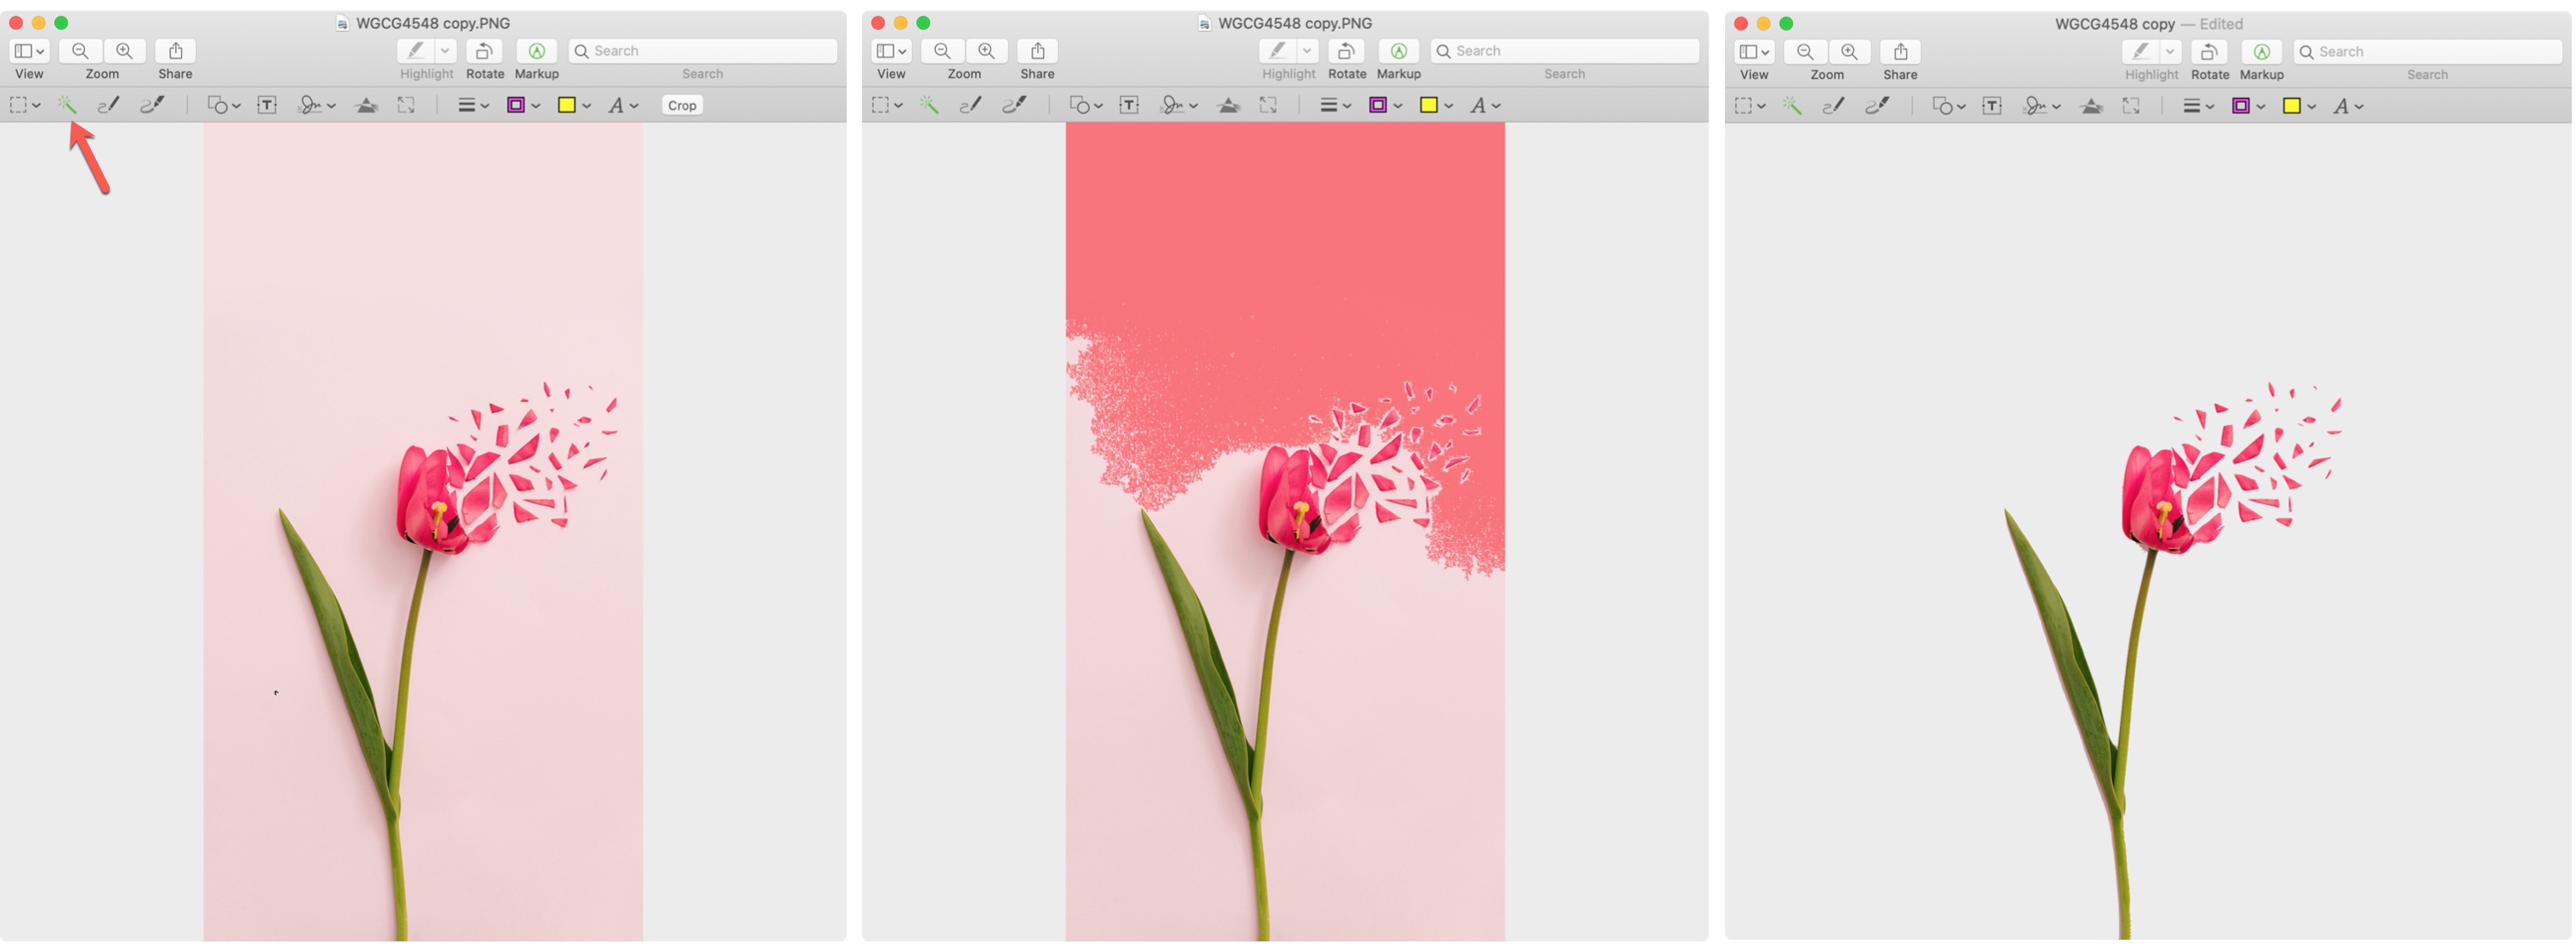
Once you remove the largest parts of the background, you can delete smaller sections that are closer to the part you want to keep by following the same steps.
Extract the image in Preview
You may have a photograph that has many of the same colors in the background as in the section you want to keep. This can make the above method more difficult. In this case, it may be easier for you to take out the part of the photo you want to keep. Open your image in Preview and do the following to extract an image.
1) Click the Markup button in the Preview toolbar.
2) On the far-left side, click the Selection Tools drop-down and pick Smart Lasso.
3) Begin tracing the part of the photo you want to keep and finish by connecting your start and end points.
4) When you see your selection, you can click Edit > Invert Selection and then your Delete key to remove the background or Edit > Copy to copy that selection and paste it elsewhere.
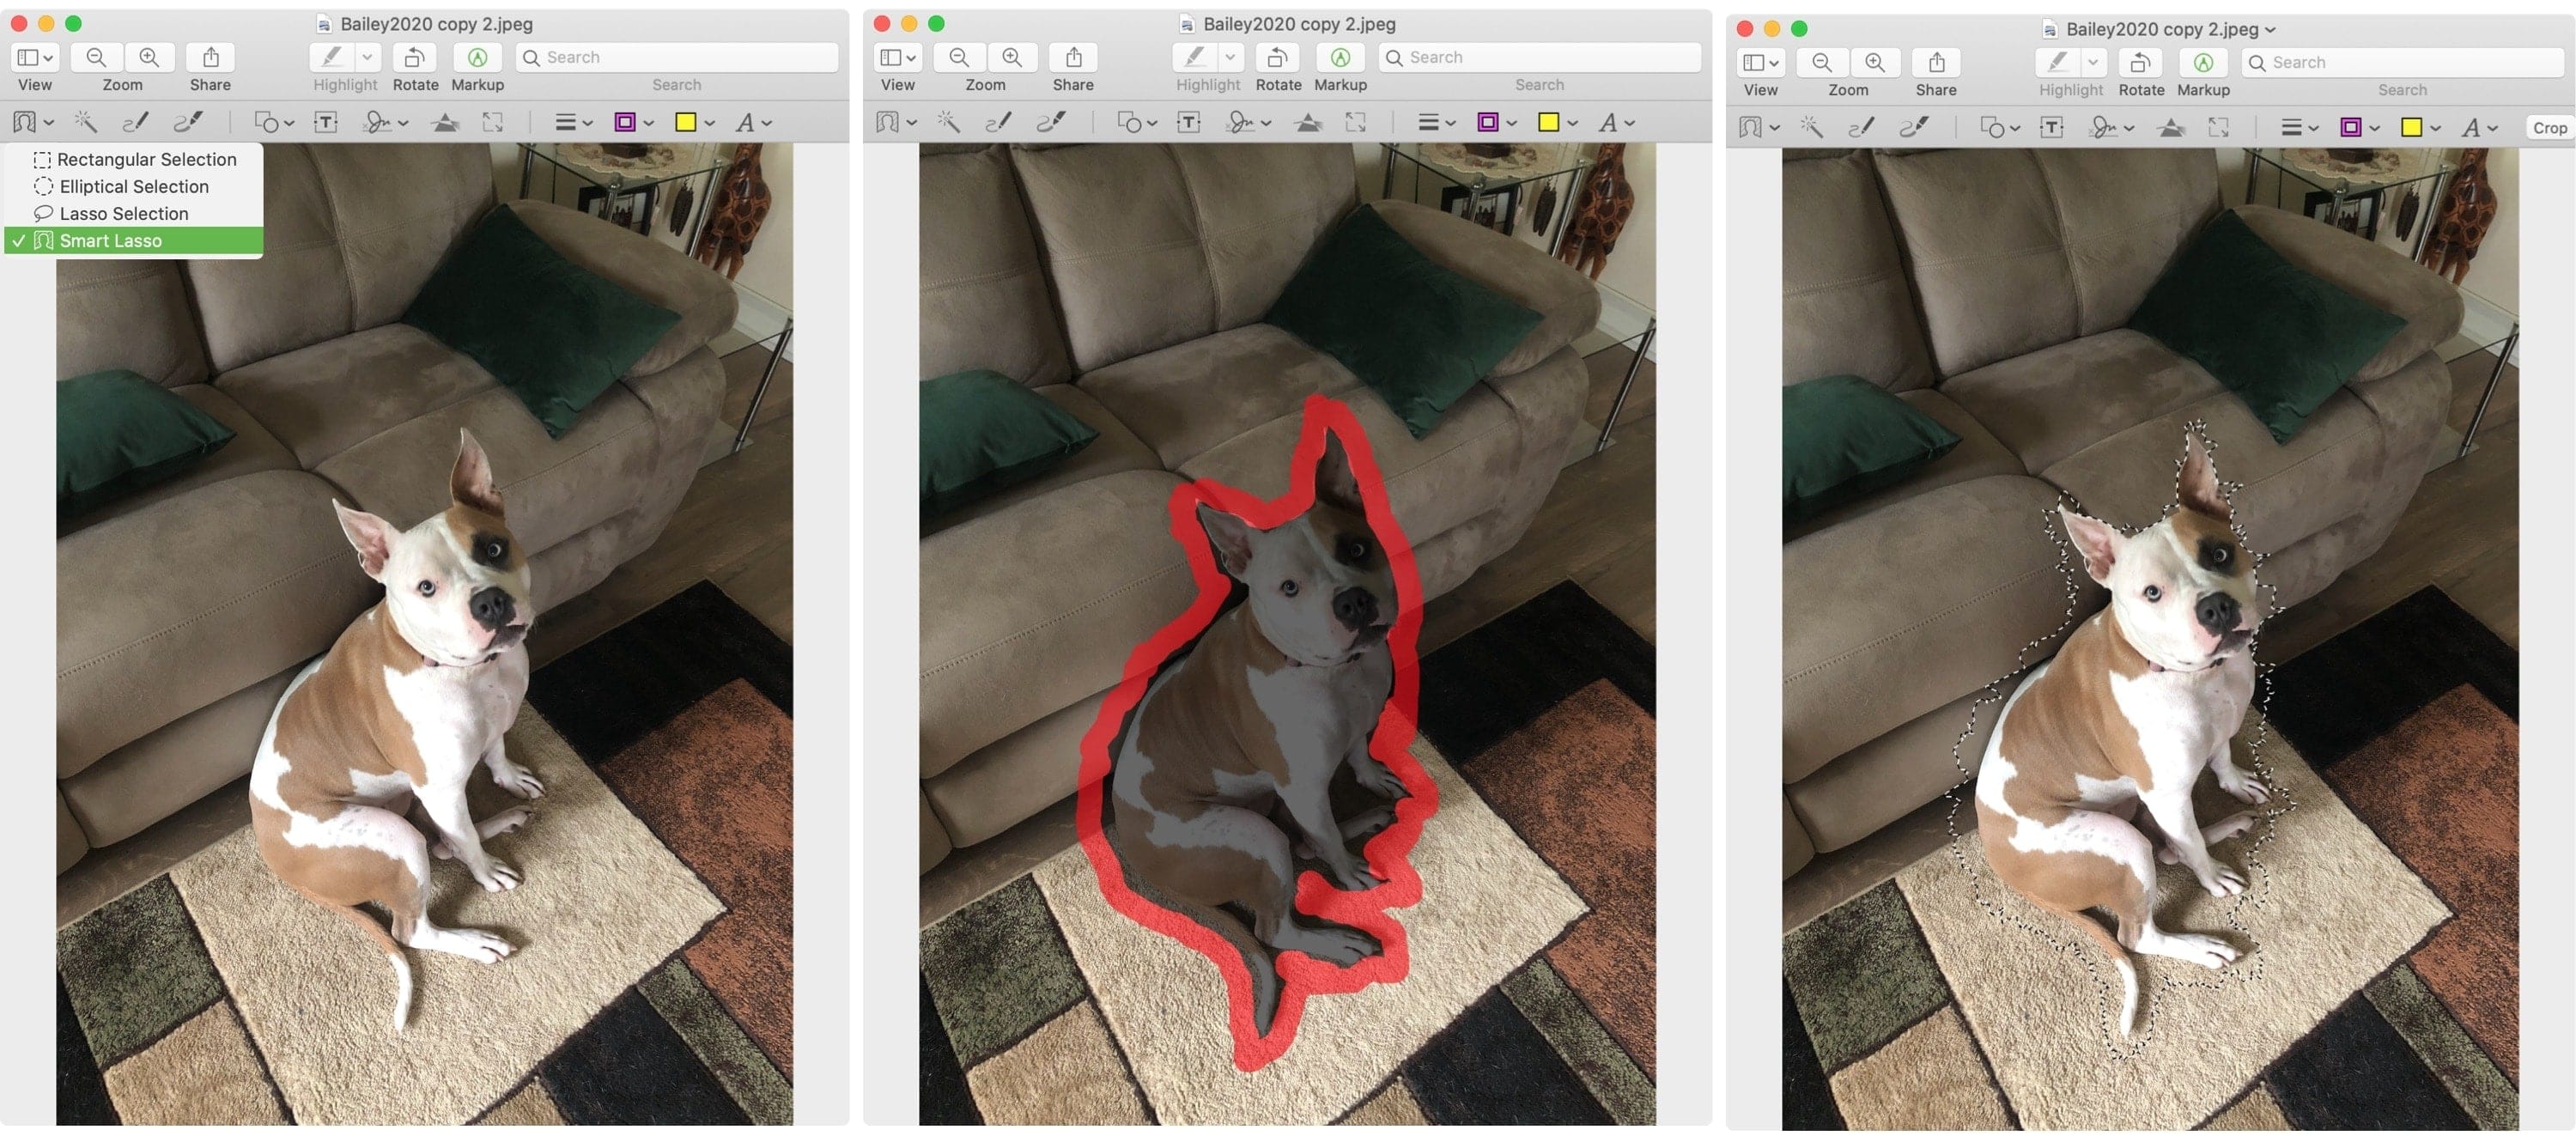
Whether you use this method to take the background out of the image or to copy what you want to keep and paste it elsewhere, it works.
Tips for removing backgrounds
Using either of the methods above, here are a few tips that may help you to remove a background in Preview.
- If you are not happy with what the tool is selecting, you can drag in the opposite direction or click another spot to stop the selection.
- When you have tiny areas to get in between, use the Zoom tool for more accuracy. Click Window > Zoom or use a trackpad gesture to zoom in.
- To keep your original photo intact, you can make a copy before you begin editing it. Simply right-click the photo in its folder and select Duplicate. This will duplicate the photo with the word "copy" at the end.
And keep in mind, you can click Edit > Undo to revert changes you make in Preview.
Wrapping it up
Preview may not be the most robust tool for editing images, but for a quick background removal, give one of these methods a try.
Have you tried using Preview for photo editing in the past? Has it worked out for the simple changes you wanted to make? Let us know! And feel free to share tips of your own in the comments or ping us on Twitter!
Change Background Color of Photo to White Mac
Source: https://www.idownloadblog.com/2020/08/21/how-to-remove-background-in-preview/
0 Response to "Change Background Color of Photo to White Mac"
Post a Comment